LizardSystems Network Scanner: find every share, printer and permission
Reviewed 15 September 2026 · Windows only · free edition + paid licence
Where a plain IP sweep stops at "this address answered", Network Scanner keeps going: it enumerates the shared folders, administrative shares and printers on each host and records what your account is actually allowed to do with them. This guide covers the whole flow using the vendor's own screenshots of every dialog.
On this page
What it does
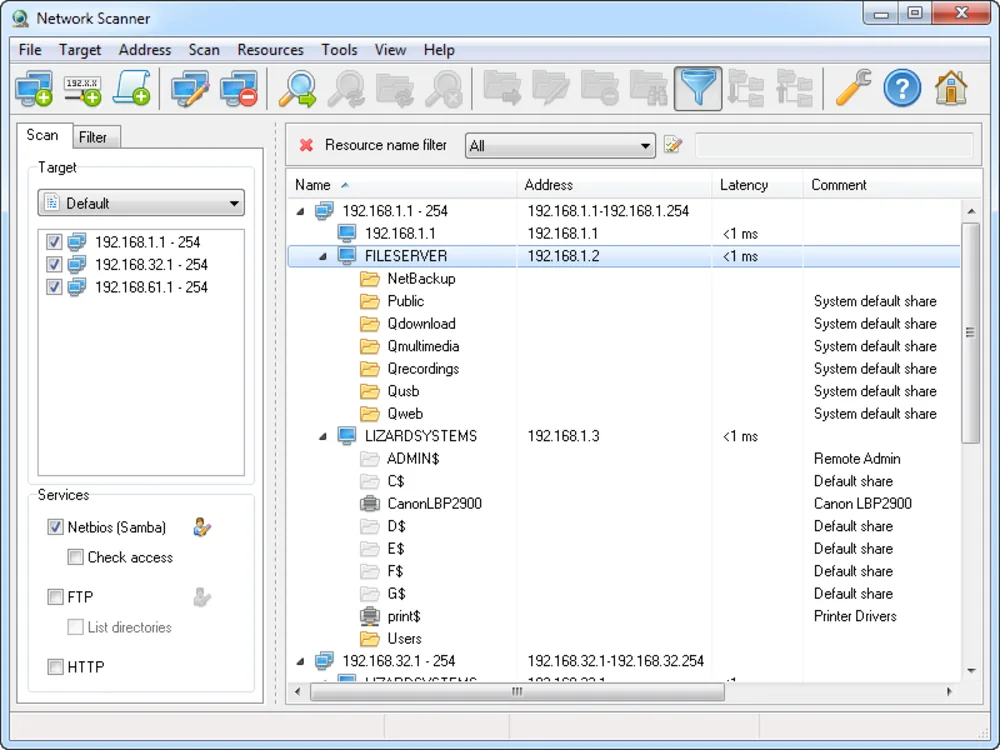
Network Scanner is a Windows desktop application aimed squarely at SMB networks. It scans one or more IP ranges, identifies every computer, and then drills into each one over NetBIOS/Samba to list its resources. The output is a two-level tree — computer, then the shares and printers underneath it — annotated with latency and a comment such as System default share, Remote Admin or Printer Drivers.
The feature that justifies it over a free scanner is the access-rights check: for each resource it records whether your current credentials get Read, Write, Access denied or an Error. That turns a scan into a permissions audit.
- Licence
- Free edition with a device limit; paid licence for unlimited scanning; trial of the full version
- Platform
- Windows (scans Windows, Samba and NAS hosts)
- Discovery
- ICMP, NetBIOS/Samba, optional FTP and HTTP probes
- Unique strength
- Per-resource read/write access-rights reporting
Step by step
-
1. Add your IP ranges
Everything starts from Target → Add IP Range. Give the range a name you will recognise later, then either type the start and stop addresses or let the program work them out for you:
- Detect IP Range fills in the subnet of the adapter you are currently on — the fastest correct answer.
- Class B / Class C expand the entered address to
a
/16or/24.
Add one range per VLAN. The left-hand target list holds them all with individual checkboxes, so you can scan the server VLAN today and everything tomorrow without retyping anything.
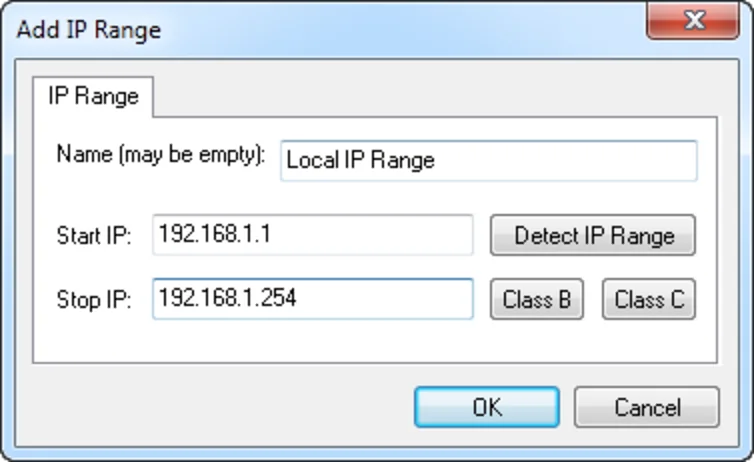
Target → Add IP Range. Detect IP Range reads it off your own adapter. Screenshot: lizardsystems.com. For anything that is not a contiguous block, use Address → Add Expression instead. The expression syntax handles multiple octets at once —
192.168.1-3.1-254covers three whole /24s in one target.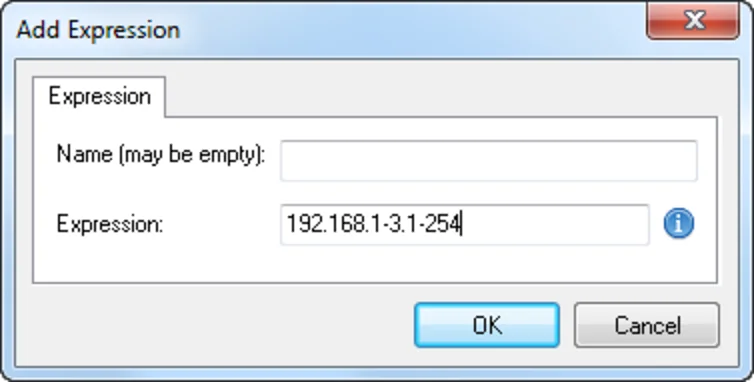
An expression target covering 192.168.1.x through 192.168.3.x. Screenshot: lizardsystems.com. -
2. Pick the services to probe
The Services box in the lower left of the Scan panel decides how deep each host is examined. Three probes are available:
- Netbios (Samba) — the core of the program. Enumerates shared
folders, administrative shares (
ADMIN$,C$,IPC$) and shared printers. - Check access — the sub-option under Netbios that actually tries each resource with your credentials and produces the read/write verdict. Without it you get a share list, not an audit.
- FTP (with optional List directories) and HTTP — catch NAS boxes, cameras and printers that publish over those protocols instead.
Scan as the right user.The access-rights column reflects your session. Run the scan as a normal domain user to see what staff can reach; run it as an administrator to inventory everything. Both answers are useful, and they are different answers.
- Netbios (Samba) — the core of the program. Enumerates shared
folders, administrative shares (
-
3. Tune the scanning preferences
Tools → Preferences → Scanning holds the two settings that decide how fast and how accurate a scan is.
Threads defaults to 64. That is comfortable on a wired LAN; halve it if you are scanning across a VPN or through a small business firewall that starts dropping sessions.
Find computer name chooses the naming source, and it matters more than it looks:
- DNS name — correct in a well-run Active Directory domain.
- Netbios name — resolves workgroup PCs, NAS devices and anything with no DNS record. This is the better default on a mixed SMB network.
- Find DNS name if netbios name failed — the belt-and-braces combination.
Delete resource of inactive computer from list keeps repeat scans honest: hosts that have gone away lose their stale share entries instead of lingering in the tree.
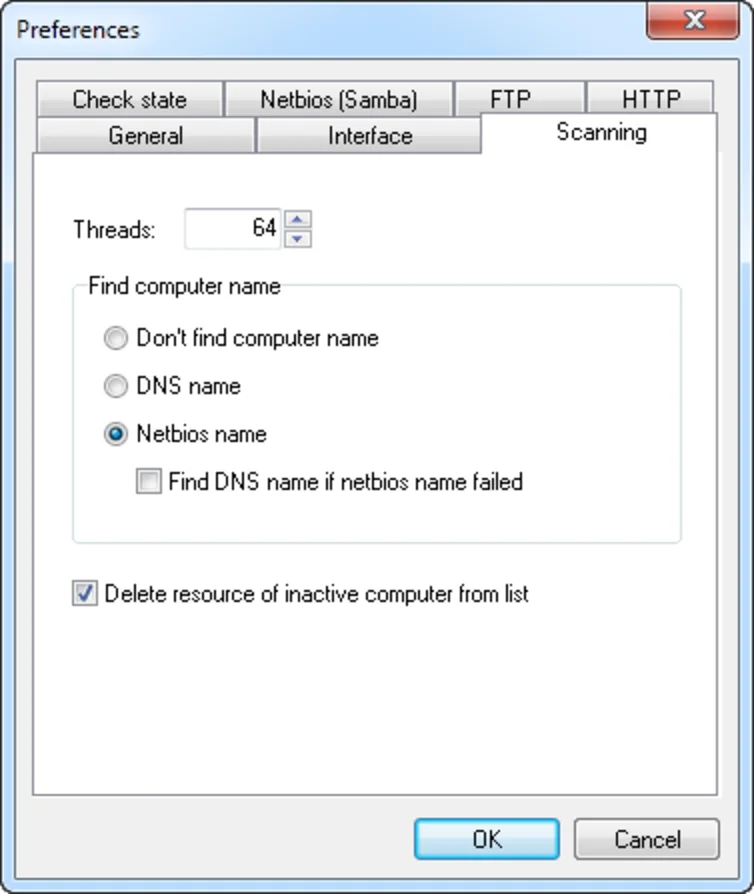
Preferences → Scanning. The other tabs — Check state, Netbios (Samba), FTP, HTTP — hold the per-protocol timeouts. Screenshot: lizardsystems.com. -
4. Start the scan and read the tree
Press Start scan on the toolbar. The tree fills top-down: ranges first, then computers, then resources underneath each computer.
Four columns carry the information:
Result tree columns Column What it holds Name The range, then the computer name ( FILESERVER), then each share or printer beneath it.Address The IP address of the host, and the range span at the group level. Latency Response time, typically <1 mson a local segment. A slow figure on a wired host is worth investigating.Comment The resource's own description: System default share, Remote Admin, Default share, Printer Drivers, or the printer model. The icons separate the resource types at a glance — folder for a share, printer for a queue — and the status bar reports progress and elapsed time while the scan runs.
-
5. Filter by state, type and access rights
A full scan of a real office produces hundreds of rows, most of them default shares you do not care about. The Filter tab — the funnel icon on the toolbar — narrows the same tree live, without rescanning. It has three groups:
- Computers by state — hide inactive hosts, or hide hosts that published no resources at all.
- Resources by type — toggle
IPC$, printer shares and administrative shares. Turning the admin shares off usually removes three quarters of the noise. - Resources by access rights — Write, Read, Access denied, Error.
The audit query.Untick everything under access rights except Write, and untick administrative shares under resource type. What is left is every non-default share on the network that your account can write to — the shortest route to finding an over-permissive folder.
Auto apply re-runs the filter as you click; leave it on.
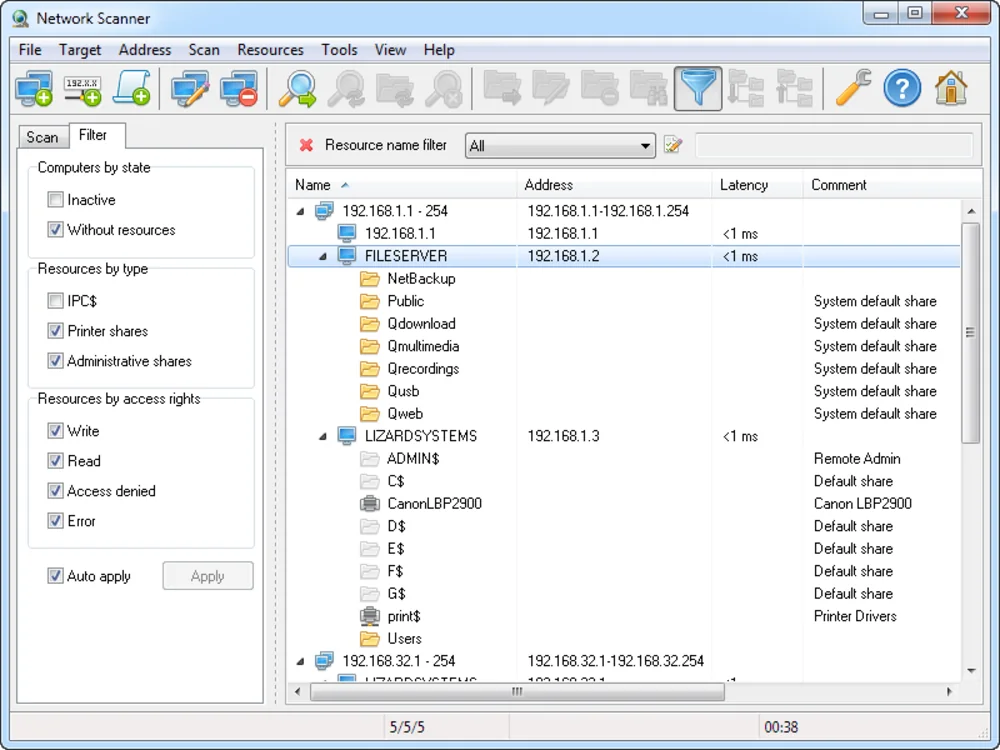
The Filter tab applied to a live scan. Screenshot: lizardsystems.com. -
6. Remote tools and exports
A found host is a starting point, not an endpoint. Tools → Manage tools holds the right-click actions available on any computer in the tree — by default Remote desktop, Shut down, Computer management, Services management, Event viewer, Local users and groups manager, and Shared folders.
Each entry is an editable command line, so you can add your own: a PsExec call, an RDP session with saved credentials, an SSH client for the Linux boxes, or a script that takes the IP as an argument. Use Up and Down to put the one you use hourly at the top of the context menu.
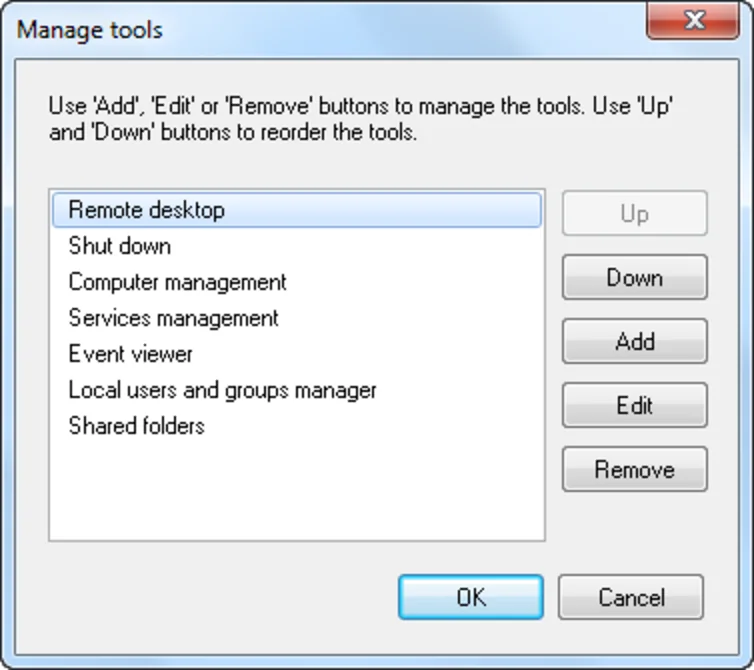
Tools → Manage tools. Every entry is a command line you can edit. Screenshot: lizardsystems.com. When the tree looks right, export it from the File menu. The report formats are suitable for handing to an auditor directly, and a saved scan can be reopened later and compared against a fresh one — the practical way to notice that a new writable share appeared last month.
Troubleshooting
| Symptom | Cause | Fix |
|---|---|---|
| Hosts are found but show no resources | SMB is blocked or the host refuses your session | Allow File and Printer Sharing through the host firewall; confirm ports 139/445 are reachable |
| Everything reads Access denied | The scan is running as a user with no rights on those hosts | Run as a domain account that has at least read access, or as an administrator for a full inventory |
| Computer names are blank | No reverse DNS and NetBIOS naming disabled | Preferences → Scanning: select Netbios name, or the DNS fallback option |
| Scan is very slow | Thread count too high for the link, causing retries | Reduce threads to 16–32 and raise the per-protocol timeouts on the Check state tab |
| NAS or Linux server missing | SMBv1 disabled on one side, or the device only speaks FTP/HTTP | Enable the FTP and HTTP probes in the Services box |
| Stale shares from decommissioned hosts | Previous scan results retained | Enable Delete resource of inactive computer from list |
FAQ
Is LizardSystems Network Scanner free?
There is a free edition limited to a small number of devices and a paid licence for unlimited scanning; a time-limited trial of the full version is available from the vendor. Check lizardsystems.com for the current limits and pricing.
Does it run on macOS or Linux?
No. Network Scanner is a Windows desktop application. It can discover Samba shares hosted on Linux or NAS devices, but the program itself needs Windows.
What does the access-rights filter actually test?
For each share found it attempts to enumerate and open the resource with your current credentials and records the outcome as Read, Write, Access denied or Error, which is what makes it useful for finding over-permissive shares.
How is it different from Angry IP Scanner?
Angry IP Scanner tells you which addresses are alive and which ports are open, on any operating system, for free. Network Scanner assumes a Windows/SMB network and goes one level deeper — the shares, the printers and the permissions behind each address. Most administrators end up using both. Full comparison →
Network Scanner inventories hosts and their resources. To find out which physical switch port each of those hosts is plugged into, you need SNMP — see Engineer's Toolset or the network mapping walkthrough.