Angry IP Scanner: install, scan and export a full LAN inventory
Reviewed 15 September 2026 · version 3.9.x · Windows, macOS, Linux
Angry IP Scanner is the fastest way to answer "what is actually on this subnet?" on any operating system. This guide walks the whole workflow — install, range, fetchers, scan, export — using the project's own screenshots, and explains what every column and marker means.
On this page
What it does
Angry IP Scanner (often written "ipscan") pings every address in a range you give it, and for each address that answers it runs a set of small plugins called fetchers — reverse DNS, MAC address, MAC vendor, open TCP ports, HTTP server banner, and more. The result is a flat table, one row per address, that you can sort and export. It is deliberately not a monitoring platform: there is no database, no agent and no scheduler.
It is released under GPLv2 and distributed as a portable executable, so it can run from a USB stick on a machine where you have no administrator rights.
- Licence
- Free, open source (GPLv2)
- Platforms
- Windows, macOS, Linux (Java-based)
- Install
- Portable binary or installer
- Discovery
- ICMP ping, ARP-assisted MAC lookup, TCP port connect, DNS/NetBIOS names
Step by step
-
1. Install it
Download only from angryip.org/download or the project's GitHub releases page. Pick the package for your platform:
- Windows — the
.exeinstaller, or the portableipscan-win64-*.exethat runs with no installation at all. - macOS — the
.dmg. On first launch use right-click → Open to get past Gatekeeper, since the build is not notarised under an Apple developer account. - Linux —
.debor.rpm, or the plain.jarif you prefer to supply your own runtime.
If it will not start:the bare
.jarand some Linux packages need Java 11 or newer installed separately. The Windows and macOS bundles already contain a runtime.Antivirus warnings are expected.Several engines classify any IP/port scanner as a "hacktool" or "riskware". That is a category judgement, not a malware detection. Verify the checksum published on the download page before you allow the file, and never take the binary from a third-party download portal.
- Windows — the
-
2. Set the IP range
The top strip of the window is the entire scan configuration. Type the first address of your subnet on the left, the last on the right, and leave the selector on IP Range.
Two shortcuts save you the arithmetic:
- The IP↑ button loads the address of your own network interface into the range.
- The netmask list beside it (
/24,/16, …) instantly rewrites the start and end addresses to cover that whole prefix.
For a typical home or small-office LAN this means
192.168.1.0to192.168.1.255, i.e. a/24.
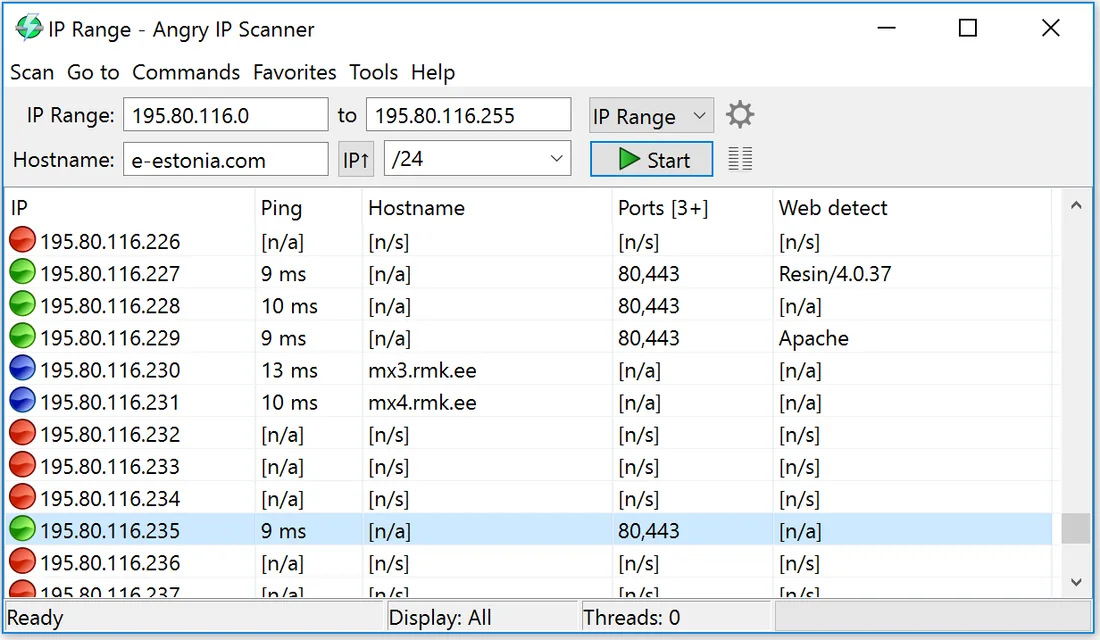
The range controls: start and end address, range type, the IP↑ button, the netmask selector and Start. Screenshot: angryip.org. The selector also offers Random and IP List File. The list-file mode is the practical one: feed it a text file of addresses exported from DHCP and re-scan exactly the same hosts every week.
-
3. Choose the fetchers
Out of the box the table is thin — IP, ping, hostname, ports. Open Tools → Fetchers and move the ones you need from the left list to the right. For inventory work the useful set is:
- MAC Address — the hardware address, read from the local ARP cache after the ping. Works on the local segment only.
- MAC Vendor — turns the MAC's OUI prefix into a manufacturer name, which is how you spot the Raspberry Pi or the unexpected phone.
- Web detect — the HTTP server banner, so printers, cameras and NAS boxes identify themselves.
- Ports — set the port list in
Tools → Preferences → Ports; something like
22,80,443,445,3389,8080is enough to classify most hosts. - NetBIOS info — computer name, workgroup and logged-in user on Windows hosts that have no DNS record.
In Preferences → Scanning you also control the two settings that decide accuracy: the ping timeout (raise it to 1000–2000 ms on Wi-Fi or across a VPN) and the thread count (lower it if a cheap router starts dropping traffic mid-scan).
Display setting worth changing.In Preferences → Display, switch from "Alive hosts only" to scanning everything but displaying only hosts with open ports when you are hunting for services rather than counting devices.
-
4. Run it and read the results
Press Start. A /24 with default settings finishes in a few seconds on a wired network. Each row carries a coloured marker in the first column:
- Red — dead. No reply to the ping.
- Green — alive, and at least one scanned port is open.
- Blue — alive, but none of the scanned ports answered.
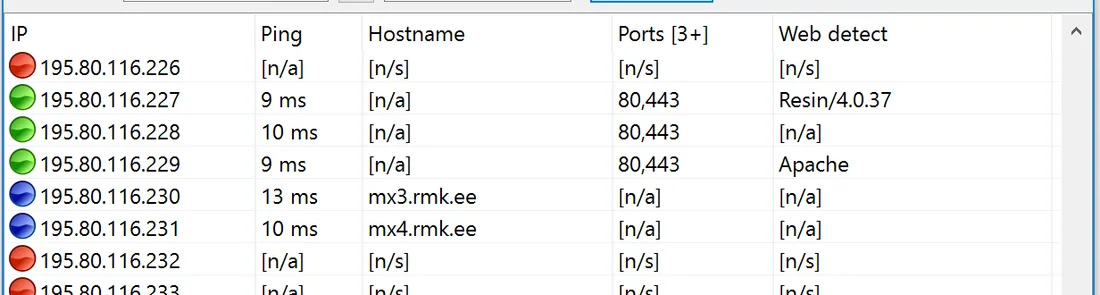
Results table. [n/a]and[n/s]are not the same thing — see below. Screenshot: angryip.org.What each column and placeholder means Column / value Meaning Ping Round-trip time in milliseconds for the ICMP echo. A value here is the proof the host is alive. Hostname Reverse DNS, or the NetBIOS name if that fetcher is enabled. Ports [n+] Open ports found. The number in the header is how many ports were tested. Web detect The Server:header returned on port 80/443 —Apache,Resin/4.0.37, printer firmware strings.[n/a]The fetcher ran and found nothing. No reverse DNS record, no open port, no banner. [n/s]Not scanned. The host did not answer the ping, so the remaining fetchers were skipped. The status bar at the bottom is the summary you write down: how many hosts were alive, and the thread count still running.

Status bar: scan state, the current display filter and live thread count. Screenshot: angryip.org. -
5. Export the inventory
Scan → Export all writes every row; Export selection writes only the highlighted ones. Four formats are offered:
Export formats and what to do with them Format Use it for CSV Spreadsheets, and diffing this week's scan against last week's with diffor a pivot table.TXT A fixed-width readable snapshot to paste into a ticket. XML Feeding a CMDB or a script. IP:Port list Hand-off to another tool that expects a target list. Angry IP Scanner has no scheduler, but the command line takes the same arguments as the GUI, so a weekly baseline is a one-line scheduled task:
ipscan.exe -f:range 192.168.1.1 192.168.1.254 -o inventory.csv -qKeep the CSVs. A new MAC address appearing between two scans is the cheapest rogue device alert there is.
The same program on macOS and Linux
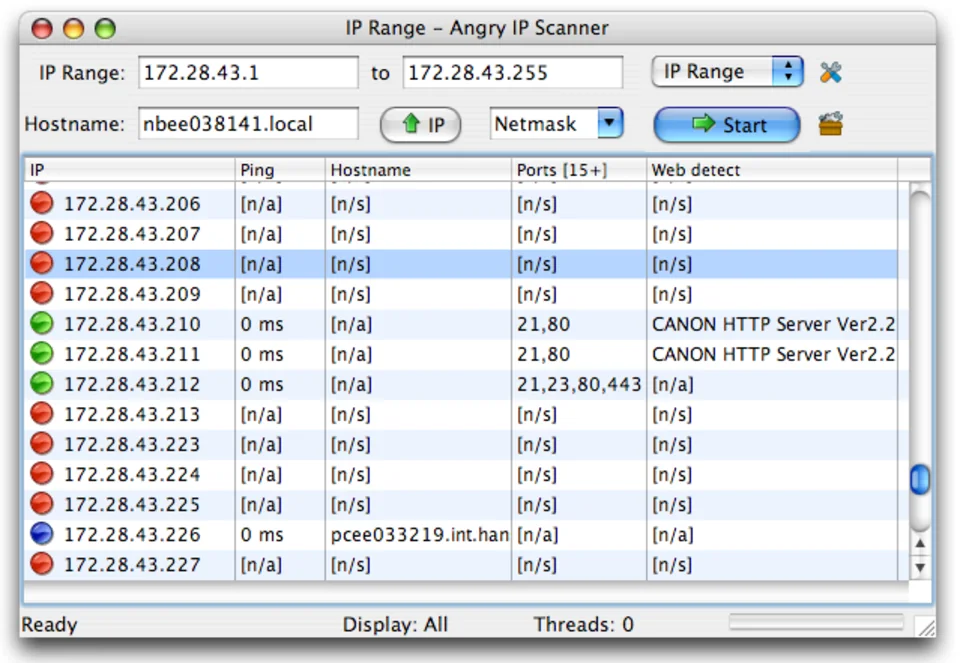
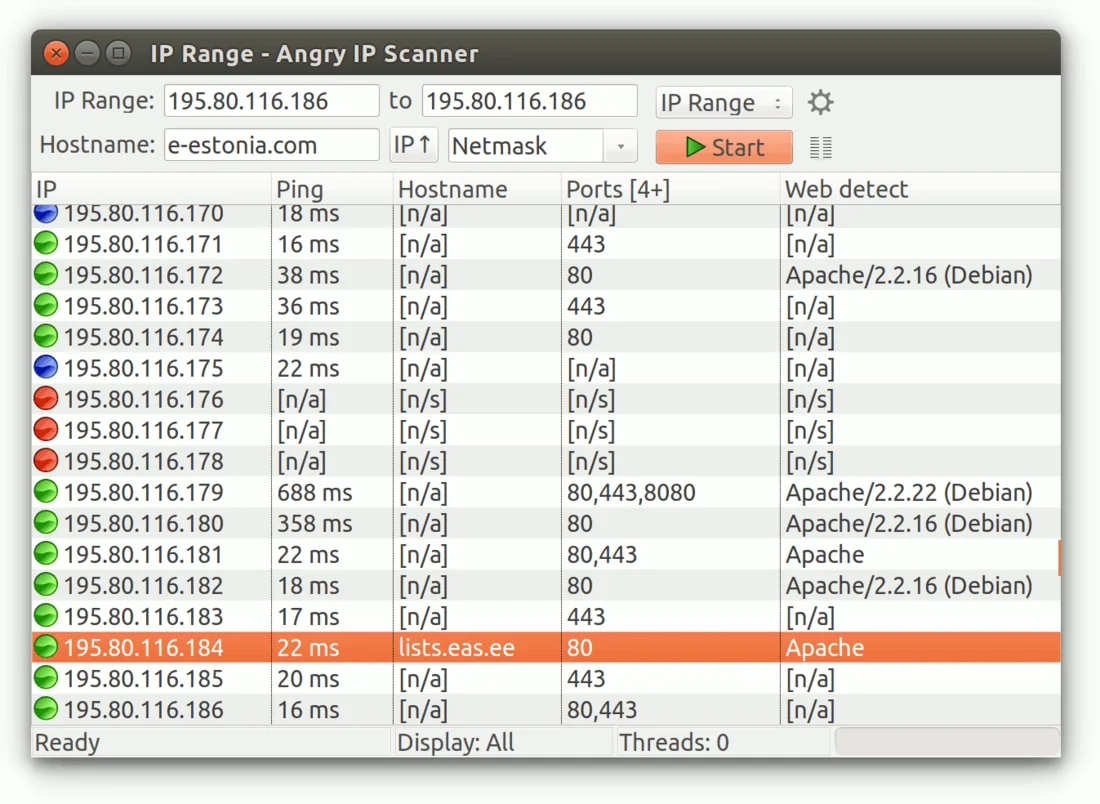
Angry IP Scanner is a Java application with a native SWT interface, so the layout, fetchers and shortcuts are identical on all three platforms — only the window chrome changes. Scans and exports made on one platform read correctly on the others.
Troubleshooting
| Symptom | Cause | Fix |
|---|---|---|
| Everything is red although hosts are reachable | Host firewalls drop ICMP echo | Add ports to the Ports fetcher so TCP proves liveness; raise the ping timeout |
| MAC Address column is empty | The target is behind a router, so it never enters your ARP cache | MAC lookup only works on your own broadcast domain — run the scan from inside that VLAN |
| Scan finds far fewer hosts on Wi-Fi | Client isolation / AP isolation is enabled | Disable isolation on the access point, or scan from a wired port |
| Router becomes unresponsive during the scan | Thread count exhausts the NAT/ARP table of consumer hardware | Preferences → Scanning: drop threads to 20–30 |
Hostnames all show [n/a] |
No reverse DNS zone for the subnet | Enable the NetBIOS info fetcher, which names most Windows and NAS devices |
| Program will not launch | Missing Java runtime | Install Java 11+ or switch to the bundled Windows/macOS package |
FAQ
Is Angry IP Scanner safe to download?
Yes, when taken from the official site angryip.org or the project's GitHub releases. It is open source under GPLv2. Some antivirus engines flag any network scanner as a hacktool; verify the SHA-256 published on the download page rather than trusting a mirror.
Does Angry IP Scanner need Java?
The Windows and macOS packages bundle a Java runtime. The plain
.jar and some Linux packages require Java 11 or newer to be installed
separately.
Why do hosts show [n/a] in the Hostname column?
[n/a] means the fetcher ran and found nothing —
typically no reverse DNS record and no NetBIOS reply. [n/s] means the
fetcher was not scanned because the host did not answer the ping at all.
Can it scan more than one subnet at a time?
Not in a single range. Either widen the mask (a /16
covers 256 consecutive /24s, but takes far longer), or build an IP list file containing
the addresses from every subnet and scan that.
Angry IP Scanner gives you the inventory. To turn that inventory into a diagram that shows which switch port each device is in, see how to map a local network, or go straight to Engineer's Toolset.